The Adjustment Features That Actually Change How You Feel After Eight Hours
- Oliver McAbbot
- May 20
- 9 min read

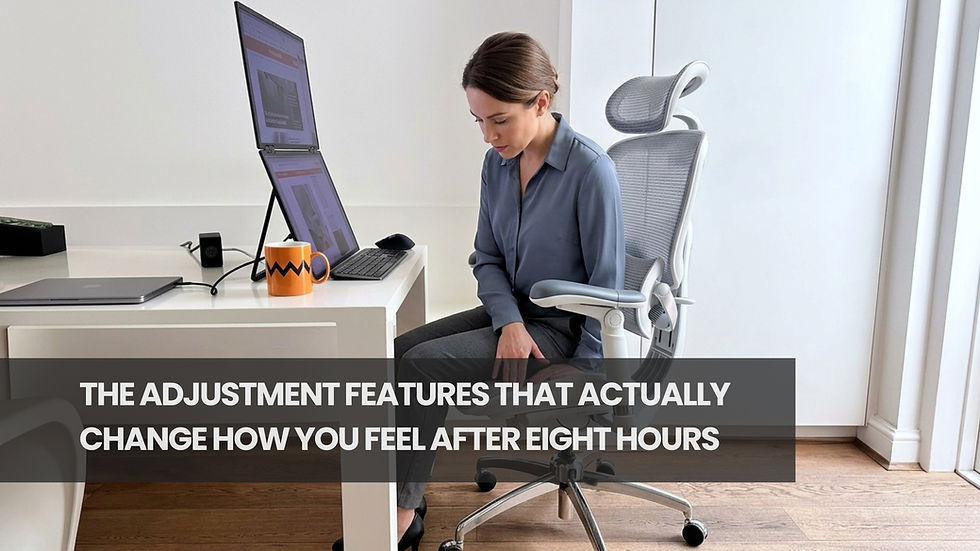
There is a short window when a new chair owner actually reads the adjustment guide. Day one, maybe day two. After that, the guide goes in a drawer and the settings stay wherever they landed. A premium ergonomic office chair has between five and nine adjustable dimensions. Most owners use two of them.
This would be less of a problem if the two adjustments people default to, seat height and maybe recline, were the ones that mattered most for a long working day. They are not. Seat height matters enormously. But the adjustments that change how you feel at hour six, seven, and eight are mostly the ones that get skipped on day one and never revisited.
What follows is an honest breakdown of which adjustments actually move the needle across a full working day, in the order they matter.
Why Most People Adjust a New Chair Once and Never Touch It Again
New chair setup happens under the worst possible conditions for accurate ergonomic calibration. The chair is unfamiliar. The body is sitting attentively and consciously upright, which is not how it will sit at 3pm on a Thursday six months from now. Adjustments get made for the person sitting in the chair for the first time, not for the person who will be in it after a full day of concentrated work.
The day-one setup locks in settings that were reasonable approximations at best. Over time the body adapts to those settings rather than the settings being adjusted to match the body's needs. This is why chairs that were comfortable in the first week often feel noticeably less so by month three, without any mechanical change to the chair itself.
The solution is straightforward: do the final setup at the end of a full working day in the second week of use. The body at that point is in the state the chair needs to support, not the state it was in when the box was opened. That adjustment session, done once properly, is worth more than any feature on the spec sheet.
What Seat Depth Does to Your Body That No Other Adjustment Can Replicate
Seat depth is the most consequential ergonomic dimension in any chair. It is also the one most buyers never test and most retailers never demonstrate. The seat depth is the distance between the backrest and the front edge of the seat. It determines whether you can use the backrest at all.
When the seat depth is too long for the user's leg length, the front edge cuts into the soft tissue behind the knee before the user can reach the backrest. The result is that the user sits forward, away from the lumbar support, which then floats uselessly behind them. A lumbar adjustment becomes irrelevant when the seat depth is wrong. A headrest becomes irrelevant. The backrest in its entirety becomes a decorative element.
How to find your correct seat depth in under a minute
Sit fully back against the backrest. Look at the gap between the front edge of the seat and the back of your knee. The correct gap is two to three finger-widths, roughly four to six centimetres. If you cannot sit back against the backrest without the seat edge pressing into your knee, the seat is too deep. Reduce depth until the gap appears. If the gap is larger than three finger-widths with the backrest in contact, the seat may be too short, though this is less common in standard chair sizes.
The signs you have set it wrong without realising
The most consistent sign of incorrect seat depth is habitual forward sitting. If you regularly find yourself perched on the front half of the seat with daylight between your back and the backrest, the seat depth is almost certainly too long. Other signs include persistent lower back soreness despite using lumbar support, and the sense that the chair is not doing anything for you despite being expensive. Both are usually seat depth problems.
The Lumbar Height Setting That Changes More Than Just Lower Back Comfort
Most people understand that lumbar support targets the lower back. Fewer people understand that a correctly placed lumbar support changes how the entire spine sits, including the mid-back, shoulders, and neck. This is why getting lumbar height right removes discomfort in parts of the body that seem unrelated to where the support is placed.
Where lumbar support should actually land
The lumbar support should contact the inward curve of the lower spine, roughly at the belt line or just above. This is lower than most people set it. The instinct is to position lumbar support in the middle of the back where soreness is most noticeable, but that soreness is usually the consequence of missing the lower curve, not the location that needs to be supported.
A well-set lumbar creates a gentle forward pressure that encourages the pelvis to tilt slightly forward. When this happens, the natural curves of the spine above it fall into better alignment without any conscious effort. The shoulders drop. The neck relaxes. The chair is doing what it was designed to do.
Why lumbar feels wrong at 9am but right by 3pm in the same setting
The body changes across the working day. Spinal disc height decreases slightly under sustained compressive load. Postural muscles fatigue gradually. The lumbar curve position shifts downward and inward as the day progresses. A lumbar set for a fresh morning spine will feel too high by the afternoon. This is not a defect in the chair. It is a reason to calibrate lumbar position at the end of the working day rather than the start, as that represents the state the chair will need to support for the majority of each working day.
Armrest Positioning and Why the Common Setup Creates Tension Instead of Relieving It
Armrests done correctly take load off the shoulder and neck. Armrests done incorrectly actively increase shoulder elevation and neck tension. Most office armrests fall into the second category, not because of a product defect but because of how they are set.
The drop-shoulder test for armrest height
To find the correct armrest height, drop both shoulders completely. Let them fall to their natural resting position without holding them up or pressing them down. The armrest should meet the elbow at this position. If the armrest is higher than the elbow at natural shoulder drop, the shoulder has to rise to use it. The user spends eight hours in slight shoulder elevation, which accumulates as neck and upper trapezius tightness by end of day.
Many users set armrests at the height that feels right when they are sitting attentively, which is typically too high. The correct height feels almost too low initially. This is expected. After a few days at the correct height the tension pattern changes.
Depth and angle: the two armrest dimensions most buyers never find
Armrest depth positions the pad closer to or further from the body. The correct depth places the elbow directly below the shoulder with a natural bend at the elbow, usually around 90 degrees. Armrests too far forward pull the shoulder forward. Too close, and the arm cannot rest without forcing the shoulder inward.
Armrest angle determines whether the forearm rests on the inner or outer edge of the pad. A slight inward tilt accommodates the natural angle of the forearm better than a flat surface. Not every chair offers this adjustment, but among ergonomic desk chairs for home and office in Australia, the chairs that do offer independent armrest angle adjustment consistently perform better in long-session testing.
Recline Tension and Why Getting It Wrong Costs You Energy All Day
Recline tension controls how much resistance the backrest provides when you lean into it. Set it too stiff and you sit rigidly upright with the muscles of your back doing the work the backrest should be doing. Set it too loose and the chair leans back unpredictably, causing the body to use constant subtle effort to remain upright.
The correct tension allows the backrest to follow small natural movements, sitting back slightly during reading or thinking and returning smoothly when you return to the keyboard. This is called dynamic sitting. A chair that supports it correctly reduces the muscle fatigue that accumulates from sustained static sitting, which is one of the most underappreciated benefits of a quality premium office chair. The tension setting that achieves this is typically looser than what most people set on day one.
For office chairs in Australia used in home offices without the natural movement breaks that managed office environments provide, recline tension is more consequential than in a traditional office setting. Home workers sit statically for longer unbroken periods, and the recline tension is the main mechanism that introduces movement into what would otherwise be a completely static seated posture.
Common Mistakes When Adjusting a Premium Office Chair
Adjusting everything in one sitting is the first mistake. Adjustments interact with each other. Changing seat depth shifts the relationship between the body and the lumbar support, which then needs readjustment. Changing seat height changes the correct armrest height. Change one setting, use it for two full working days, then assess the next.
Adjusting at the beginning of the day is the second mistake. The fresh morning body is not representative of the conditions the chair needs to support. Adjust at the end of a full working day in week two. The body at that point reflects the load the chair will carry every afternoon.
Treating discomfort as chair failure is the third mistake. Discomfort in a correctly specced chair is usually a calibration problem, not a product problem. Before writing off a chair, run through every adjustment systematically using the sequence described here. Read the most current guidance on ergonomic desk chairs for long hours and a complete guide to ergonomic desk chairs for home and office setups for detailed specification guidance. And if you are still evaluating whether the investment in a premium office chair is actually worth it, the correct answer almost always depends on whether the chair is actually being used correctly, not whether it is expensive.
Practical Takeaways
Start with seat depth. This is the adjustment that either enables every other feature or renders them useless. Get the two to three finger gap right before touching anything else.
Set lumbar support below where soreness is felt, not at it. The correct position is at the inward curve of the lower spine, at or just above belt height. Confirm this setting at end of day, not morning.
Use the drop-shoulder test for armrest height. The setting that feels too low initially is usually correct. Give it four working days before evaluating.
Loosen recline tension from whatever it was set to on day one. The chair should move with the body through natural working movements, not resist them.
Conclusion
The chair you bought is probably capable of supporting you through an eight-hour day without physical consequence. Whether it actually does depends on five calibration decisions, not the chair's price tag. Seat depth, lumbar height, armrest height, armrest depth, and recline tension. One afternoon of careful adjustment, done at the end of a real working day in week two, changes the chair's performance more than any specification on the product page.
Frequently Asked Questions
How long does proper chair adjustment take?
The initial setup takes 20 to 30 minutes if done thoroughly. The more important review session in week two takes 15 minutes. After that, small seasonal adjustments of two to three minutes are sufficient.
Should I adjust my chair every day?
No. Once calibrated correctly, the settings should remain stable. If settings drift or feel different from day to day, check the mechanisms for loosening. Some adjustment mechanisms have locking levers that need to be engaged properly after setting.
What is the most important adjustment to get right first?
Seat depth. It determines whether every other ergonomic feature in the chair can do its job. An incorrectly set seat depth makes lumbar support, headrest, and backrest angle largely irrelevant because the user cannot reach the backrest.
Why does my chair feel different in the afternoon from the morning?
Your body changes through the day. Spinal disc height decreases under load, muscle fatigue accumulates, and the natural spinal curves shift. Settings that were correct at 9am may be marginally off by 3pm. Set up for the afternoon body rather than the morning one.
Can I adjust my chair to fix back pain?
In many cases, yes. Lower back pain from a desk chair is more often a calibration problem than a product problem. Start with seat depth and lumbar position. If pain persists after proper calibration, consult a health professional as there may be factors the chair cannot address.
How do I know if armrests are set correctly?
Drop your shoulders completely and check whether the armrest meets the elbow there. If you have to raise your shoulder to reach the armrest, lower it. Correct armrests feel almost passive — the arm rests without any effort to keep it there.
Is seat height still important if I get the other adjustments right?
Yes. Seat height determines the angle of the thighs, the position of the knees, and the relationship between the elbows and the desk. It is the foundation all other adjustments build on. The correct height has the thighs roughly parallel to the floor and the elbows at desk level.


Comments